Saturday, March 7, 2020

Stitch Sequence for Scallop Crochet Eding into Entredeux


Stitch Sequence for  Scallop Crochet Edging into Entredeux
(size 12 perle cotton/#10 crochet hook)

1. Inset hook from front to back through first chosen entredeux hole.  Draw through a loop of thread.


2.  Holding the thread tail in place on the back side of the work, make one chain stitch in entredeux hole #1 with the working thread.  Tension the new loop down to the edge of the entredeux.


3. Single crochet into the next available entredeux hole.  Continue to single crochet in each subsequent entredeux hole keeping an even tension.


4. Turn work to begin second row.


5.  Chain 1. 


6.  Single crochet into first stitch.


7. Skip 1 stitch.

8.  5 double crochet in next stitch.


9.  Skip 1 stitch.

10.  Single crochet in next stitch.


11.  Skip 1 stitch

12.  5 double crochet in next stitch. 


11.  Skip 1 stitch.

13.  Single crochet in next stitch.


14.  Continue in established pattern for desired length.


15.  The abbreviated pattern would read:
·        Row 1:  SC
·        Turn work
·        Row 2:  Ch 1, SC in first stitch, *skip 1 st, 5 DC in next st, skip 1 st, 1 SC in next st;  Rep from * to end.  Fasten off.


                                                                 Chain Stitch


Single Crochet


Double Crochet


Friday, March 6, 2020

Fabric Ruffle, Piped, Peter Pan Collar Tutorial


Fabric Ruffle, Piped, Peter Pan Collar
   
 1.  Using a #2 pencil, trace the collar outline (make sure to flip the pattern over to make a left and a right collar) onto the right side of a block of fabric.  Be careful to line up the grain line of the collar to the grain line of the fabric.  DO NOT cut out the collar.  Mark the center front, center back, and the shoulder line.


2.  Fuse lightweight interfacing to the wrong side of the collar fabric block.  For lightweight fabrics an alternative to interfacing is to use two layers of the outer fabric.

3.  Cut bias strips to the following widths (depending on chosen seam allowance):
·        ¾” wide for ¼” seam allowances
·        1” wide for ⅜” seam allowances
·        1 ¼” wide for ½” seam allowances
·        1 ½” wide for ⅝” seam allowances
Wrap the bias strip around the filler cord and use a zipper foot, five groove pintuck foot, cording foot, or open toe applique foot to stitch close to, but not catching the filler cord.  There should be the width of one needle between the stitching and the cord.  Use a 2.5 stitch length.

4. Cut a length of piping the approximate length of the collar perimeter.  Clip into the piping seam allowance at ½” intervals.  Steam shape the piping to the perimeter of the collar.  Stitch the piping (2.0L) to the collar, stitching just inside the stitching line on the piping.  Be careful to keep the raw edges of the piping aligned to the drawn collar perimeter.  Do not stretch the piping while stitching.


2. Cut out the interfaced, piped collar front on the perimeter pencil line.  Cut out the neckline curve ½” from the pencil line.


3.  Using a steam iron, gently press the piping into its finished position, easing in the seam allowances on the wrong side of the collar.  It will look lumpy...don't panic.  All that excess seam allowance will end up being cut off.


4.  For a ¾” wide finished ruffle cut 2 ¼” bide bias strips twice the length of the finished collar edge.  Fold the bias strips in half (lengthwise and wrong sides together) and press.  Use the ruffle guide provided to shape both ends of the collar ruffle.


5. Run two rows of gathering threads (3.0L), one at ⅛” and the second at ⅜” away from the cut edges of the collar ruffle.  Mark the center point and gather up the collar ruffle to the finished collar measurement.  Pull from each end in toward the center point. 


6.  Mark the center front and the center back SEAMLINE (not cutting line) on the piped collar.  These marks are where the collar ruffle should end. 


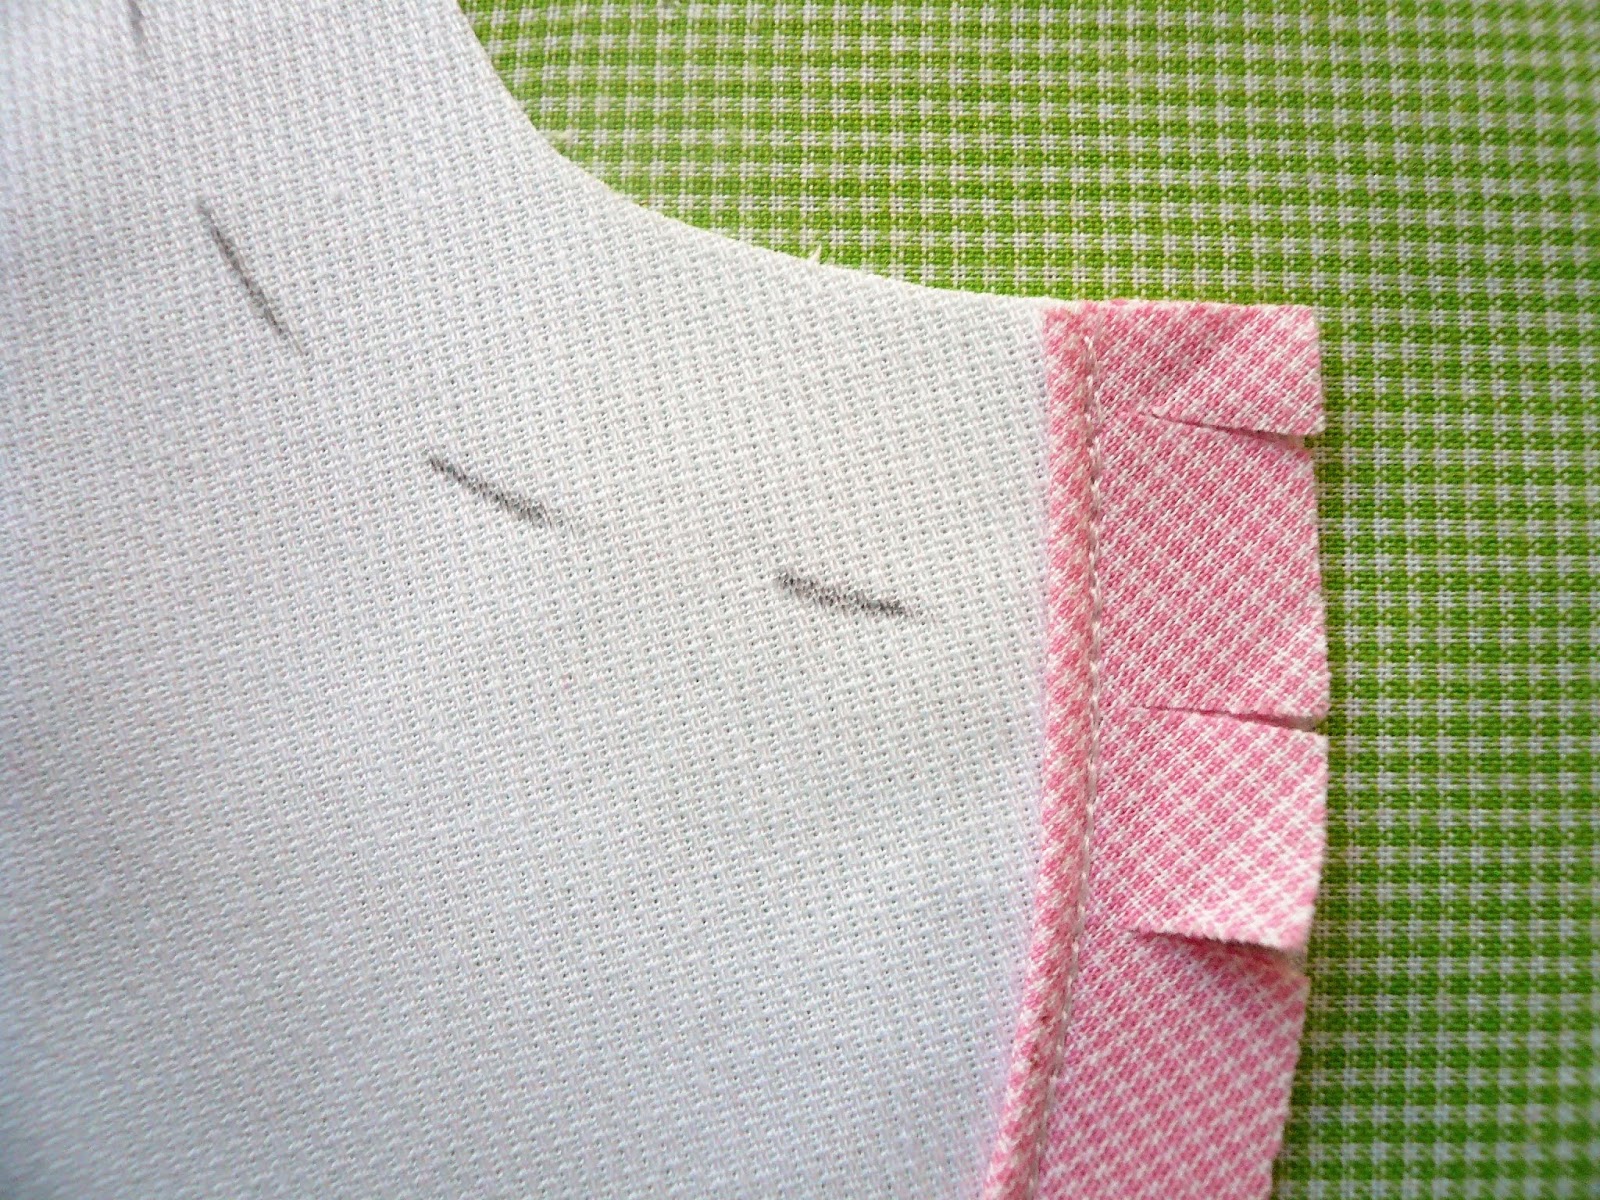
7.   Working from the right side, pin the gathered up ruffle to the wrong side of the collar having the ⅜” gathering thread line positioned just beyond the piped edge of the collar. 


8.  Machine baste (5.0L) right along the piping, holding the gathered ruffle in its finished position.  Be sure the ruffle begins and ends at the marked center front and center back SEAMLINES.


9.  Flip the seam allowances back out, which will force the ruffle toward the center of the collar.  The basting line from Step 8 will keep the ruffle in its correct position while you proceed with the finishing steps of the collar. 

10.  Matching fabric grain lines and right sides together, lay the collar front over the collar backing, sandwiching the piping and the ruffle in the middle.  Pin in place. 


11.  Stitch (1.5L) right on top of the stitching line from the application of the piping.  Stitch again (1.5L), a scant 1/16” away from the first stitching line. 


12. Trim through all layers very close to the second stitching line around the perimeter of the collar. 


  13.  Remove the basting thread lines from the piping and the inner edge of the gathered ruffle.  I do not cut out along the neckline cutting line until I am ready to sew the collar into the neckline of the garment.  This prevents the collar from stretching during preparation. 


Saturday, July 16, 2016

Bound Buttonhole Tutorial

I have had several requests for a little picture tutorial of my method for making bound buttonholes. I posted this photo last week on my Facebook page and the Classic Sewing Magazine Facebook page. 
It is a close up of a bound buttonhole made with (somewhat enhanced) mini piping using a piping foot on my sewing machine.  


The bound buttonholes are featured on this project which will be a new class in 2017.  The jacket and dress fabric are cotton twill from Fabric Finders paired with a 100% pima cotton traditional tartan from Spechler/Vogel.  The easy fitting raglan sleeve jacket has lots of construction details....bound buttonholes, double welt bias cut front pockets (which look like huge bound buttonholes), bias cut collar overlay, bias cut cuff turnbacks, mini piping on all perimeter edges, and  a pleated back with piped tab. 


The coordinating dress features a bodice front overlay with a bias cut contrast tartan band, bias cut tartan sleeve overlays, piped back belt with bound buttonholes, and buttons all the way down the back.  The hem is bound and shaped to accomodate the A-line of the pleated skirt.

Project kits will be available in several color options - should be something that appeals to everyone.


Here is a picture step-by-step of my methond for making the bound buttonholes.  

1.  Clearly mark the placement of the buttonhole(s) on the right side of the fabric.  For a 1" button (for the  jacket) I marked a 1 1/8" buttonhole and for a 1/2" button (back belt on dress) I marked a 5/8" buttonhole. Work over interfaced fabric.   


  2. Draw in two more lines each an accurate 1/8" away from the center placement line.


3.  Make enough piping for the length of each buttonhole plus 1" (x's 2).  For this weight of fabric I found using two strands of filler cord instead of one made for a studier, better proportioned bound buttonhole.  I did not adjust my needle position as close to the cord as I normally would for single strand piping.  Trim the seam allowance down to an accurate 1/8".  I checked and it appears none of the piping rulers on the market will cut a seam allowance down to 1/8" so you will have to have a steady hand to make an accurate cut.


4. Cut the piping the length of the buttonhole plus 1".  Lay the seamline of the piping on the outer line of the marked buttonhole.  The raw edge of the seam allowance should just touch the center marked line.  Using your piping foot and adjusting the needle position as necessary to stitch close to the cord, stitch (1.5L) over the seamline on the piping  EXACTLY between the two marked vertical edges.  Backstitch at the beginning and the end.  Repeat for the second strip of piping.  The two 1/8" seam allowances should just touch on the center line.  I prefer to use the open toe applique foot to make piping on my Pfaff (rather than the mini piping foot).  One 'toe' on the foot is exactly 1/4" wide which is super helpful when lining up the strips for the buttonhole. I love my Pfaff - it has 29 needle positions which allows superb accuracy when working with piping.   


5.  The back should look like this,  Slash down the center of the back to within 1/4" at each end. Make a 'Y' cut out to the end of the stitching at each end,  


6.  Pull the piping strips through to the wrong side.  Gently press.  


7. Fold the jacket front out of the way and stitch down the little triangle at each end of the buttonhole.  Trim the excess piping down to 1/4" at each end of the buttonhole.  


8.  The following photos show the method I used to finish the lining side of the bound buttonhole.  I used silk organza with the lining window 'patch'.