I have had many requests for kits for the 'Sweetheart' project that was featured on the cover of the Australian edition of 'Cute As a Button' which is the EXACT same book as the American edition titled 'Sew Cute Couture". Believe me.... I know it's all a bit confusing. Unfortunately both titles are now out of print and can be a bit tricky to find at a reasonable price. If you happen to know of a good source that still has them please let me know.

The jacket for the original 'Sweetheart ' project was made from 100% wool Doctors flannel which started out as ivory. I had tried to dye it lavender with a different project in mind with very limited success. Because I thought I had ruined the fabric I figured there was nothing to loose and I threw it in a pot of hot water with a bottle of Rit brand black dye. The wool took the black dye beautifully. You would never know it was once a very unattractive mottled lavender. The bishop dress and jacket trim fabric is probably one of my all time favorite Liberty prints. I am being polite when I say it is a 'vintage' Liberty. It was from back when the dinosaurs still roamed the earth and Liberty prints were only 36" wide. I would like to hear from some of you fabric hoarders (you know who you are!) who still have 36" wide Liberty prints waiting for just the right project. So..... clearly it was not possible to provide kits for the project as shown as both the jacket and dress fabric were a bit obscure and completely unavailable.
My remake of the project is Dakota pique for the jacket and a lovely paisley lawn for the dress, both trimmed with 1/32" pima micro check. You might recognize the paisley lawn from a previous post. I love this fabric. It is not an easy thing to find a good quality lightweight cotton lawn in a small scale print in several nice color ways. My rule of thumb when choosing a print to coordinate with an embroidered jacket is to look for at least three distinct colors in the print and a good green. This lawn more than fits that criteria.


The kit will be available in three color ways on my Etsy site.. I would like to give a big shout out to my friends at www.hillcreekdesigns.com who make all the custom colors in hand dyed buttons for me.


There are probably as many ways to make a bullion rose as there are people making them. I would like to include my take on the classic spiral bullion. These instructions are for big chunky roses as shown on the 'Sweetheart' jacket.
Spiral
Bullion Rose:
- work with three strands of floss and a # 7 milliners needle
- it is helpful to interface the area behind the embroidery
- use three colors of floss plus a green. Use a contrast for the center and two shades of pink or red (a light and a medium shade) for the spiral rose petals. Use the darker shade for the center fifteen wrap spiral bullions and the lighter shade for the outer twenty-two wrap spiral bullions.
- the spiral bullion is made in four sections (colors):
- center - one, five wrap bullion and two, ten wrap bullions
- inner petals - six, fifteen wrap spirals
- outer petals - eight, twenty-two wrap spirals
- leaf base - four, twenty four wrap spirals
1.
Work one, five wrap
bullion at the center point.

2.
Bring
the needle back to the left and take a new backstitch to make one, ten wrap
bullion that cups beneath the five wrap bullion.


3.
Turn the work
completely over and make a second ten wrap bullion.

4. To
make the first fifteen wrap spiral bullion, bring the needle up at about
11:00. Leave a gap, the width of one
bullion stitch, between the entry point of the thread and the center bullion
stitches.

5.
Backstitch
about ¼ of the way around the center. Make
the first fifteen wrap bullion.


6.
To
make the second fifteen wrap spiral bullion, drop the needle to the back of the
work and bring it up at the half way point on the first spiral bullion.
7.
Backstitch
about ¼ of the way around the center and make a second fifteen wrap spiral
bullion.


8.
Repeat Steps 6-7 to
make the third, fourth and fifth spiral bullions.


9.
The sixth, and final
fifteen wrap spiral bullion is made be bringing the needle up at the half way
point of the fifth fifteen wrap spiral bullion.
Backstitch about ¼ of the way around the center bringing the needle in close
to the center, to the inside of the first fifteen wrap spiral bullion. Make the sixth fifteen wrap spiral bullion.
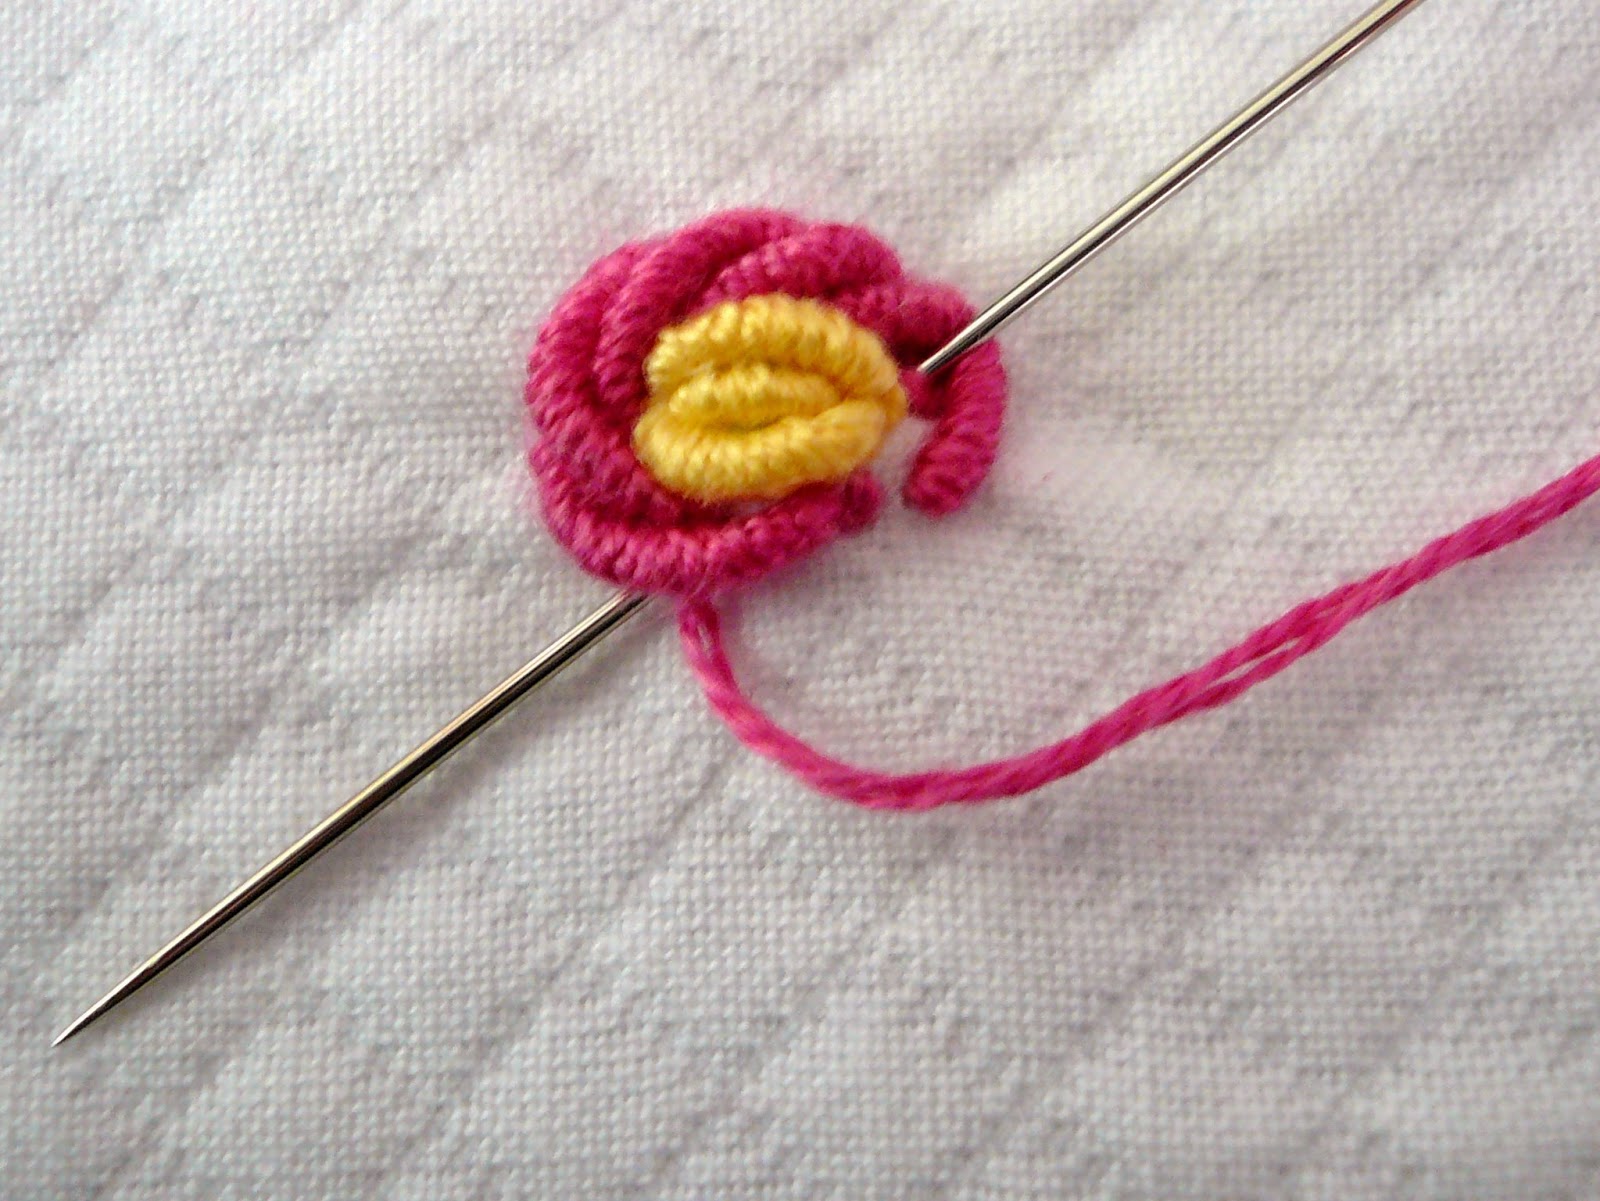

10. To make the first 22 wrap spiral
bullion bring the needle up at 11:00 leaving a gap the width of one spiral
bullion stitch. Backstitch about 20% of
the way around the center fifteen wrap spiral bullions.

11. Make the first twenty-two wrap spiral
bullion.


12. Make the second through seventh twenty-two
wrap spiral bullions in the same manner as the previous color spiral bullions.
13. The eighth and final twenty two wrap
spiral bullion is made by bringing the needle up at the halfway point on the
seventh twenty-two wrap spiral bullion.
Backstitch about 20% of the way around the center, bringing the needle
in close to the fifteen wrap spiral bullions.
Make the eighth twenty-two wrap spiral bullion.


14.
Bring the green in
about 2/3’s of the way up on the left hand side of the spiral bullion rose. Backstitch about 20% of the way around the
rose.


15. Make a twenty four
wrap spiral bullion. Make the second,
third, and fourth green spiral bullions in the same manner.


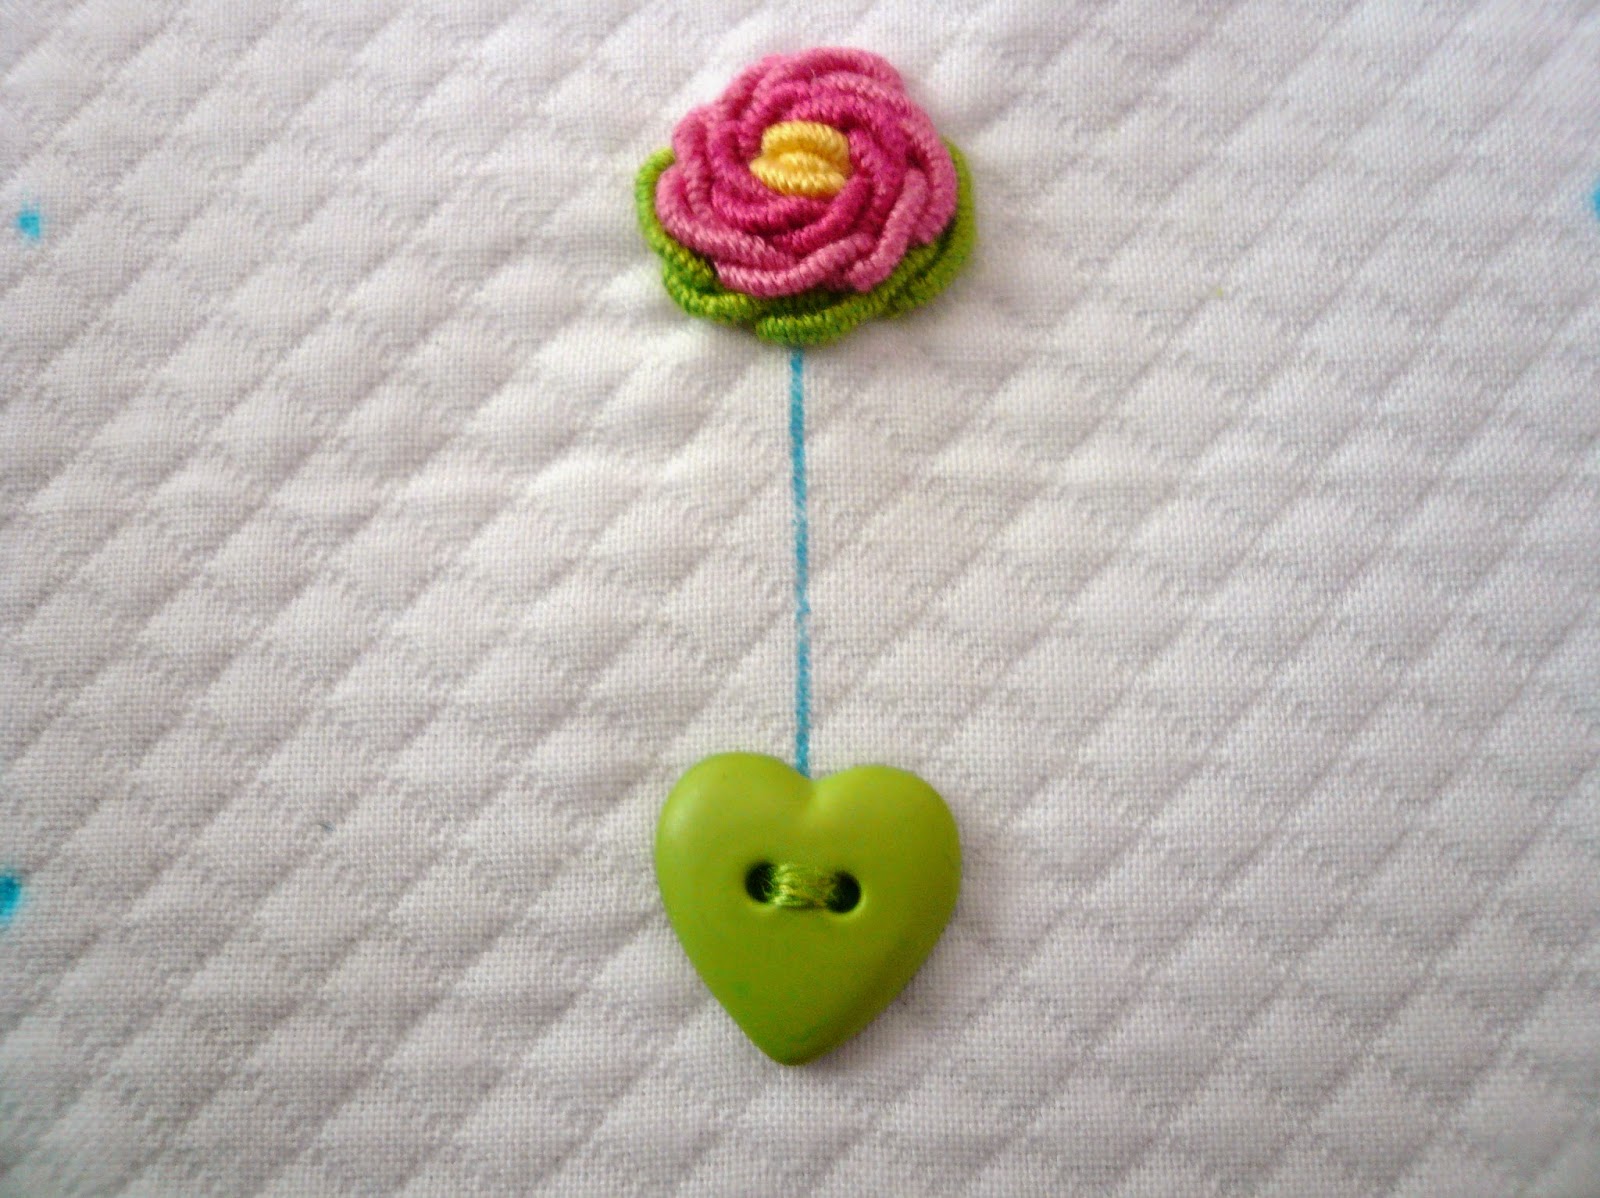
16. Stitch the heart button at the
indicated position. Use three strands of floss to outline stitch the stem line.

17.
To make the bows draw
a ¾” long line on a piece of paper. Mark
the center point and the ends of the ¾” line.

18. Using ¼” wide silk/satin ribbon cut
the end on a 45° angle. Fold the ribbon
in on itself half the distance of the ¾” line and secure with a pin.

19. Fold in the second loop keeping the
cut end of the ribbon on the inside and secure with the pin. Fold in a third loop directly behind the
second loop and secure with the pin.


20. Fold in the fourth and final loop
resulting with two sets of two loops stacked on top of each other and secure
with the pin.

21. Cut the ribbon on the back side on a
45° angle.

22. Using a hand sewing needle and doubled
thread in a matching color to the ribbon, bring the thread up through the
center of the bow. Wrap the thread
tightly around the center three times and tie off on the wrong side.

23. Use the center thread to tack the bow
to the center of the stem.

ll


.jpg)
.jpg)
.jpg)

.jpg)
.jpg)

.jpg)
.jpg)


